Building Custom Request Handlers in Mendix

Introduction
Mendix applications typically handle requests through published REST services and microflows. If you need more control over HTTP request handling you can create custom request handlers. Original article here.
When to use Custom Request Handlers?
Custom request handlers are useful when you need to do the following:
Implement Low-level HTTP request/response control
Add custom authentication mechanisms
Webhooks
Special protocols
Bypass standard processing and get more performance
Prerequisites
Mendix Studio Pro
Basic Java knowledge
Understanding of HTTP requests/responses
Implementation
Create the Java Action
Create a Java Action named StartRequestHandler that returns a Boolean.
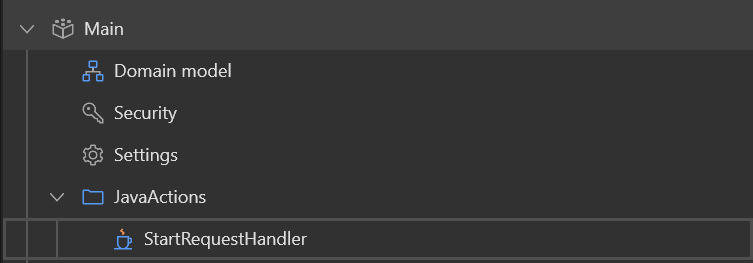
Newly Created Java Action
Set Up Startup Microflow
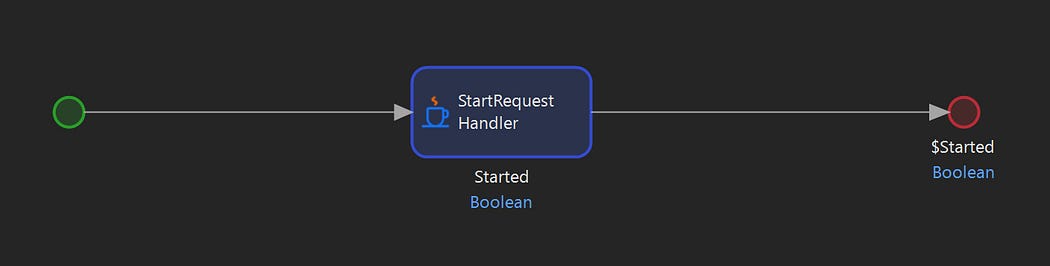
Startup Microflow
Create microflow ASU_RequestHandler
Add the StartRequestHandler Java Action
Return Boolean
trueSet as startup microflow in App > Settings > Runtime > After startup
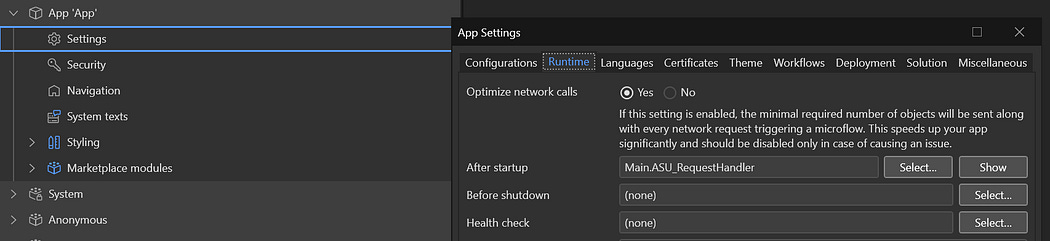
Setting the After startup Microflow
Basic Text Handler
The JavaAction created was Main.StartRequestHandler. You can find the implementation for this at javasource/main/actions/StartRequestHandler.java after Deploying for Eclipse (F6). Add the following to your Java Action to set up a basic Request Handler:
package main.actions;
import com.mendix.systemwideinterfaces.core.IContext;
import com.mendix.webui.CustomJavaAction;public class StartRequestHandler extends CustomJavaAction<java.lang.Boolean>
{
    @java.lang.Override
    public java.lang.Boolean executeAction() throws Exception
    {
        // BEGIN USER CODE
        com.mendix.core.Core.addRequestHandler(”basic/”, new MyCustomHandler());
        return true;
        // END USER CODE
    }    // BEGIN EXTRA CODE
    public class MyCustomHandler extends com.mendix.externalinterface.connector.RequestHandler {
        @Override
        protected void processRequest(com.mendix.m2ee.api.IMxRuntimeRequest request,
                                      com.mendix.m2ee.api.IMxRuntimeResponse response,
                                      String path) throws Exception {
            String name = request.getParameter(”name”);
            response.setContentType(”text/plain”);
            response.setStatus(200);
            response.getWriter().write(”Hello, “ + (name != null ? name : “Guest”) + “!”);
        }
    }
    // END EXTRA CODE
}
Test the Basic Handler
Now you can start your server, and test using the following
curl http://localhost:8080/basic/This should return a body “Hello, Guest!”. You can also test the endpoint with query parameters.
curl http://localhost:8080/basic/?name=JohnThis should return “Hello, John!”
Step 5: Add JSON Handler
Extend your Java Action to handle JSON requests. Add the import statements and new handler
package main.actions;
import com.mendix.systemwideinterfaces.core.IContext;
import com.mendix.webui.CustomJavaAction;
import com.mendix.thirdparty.org.json.JSONObject;
import com.mendix.thirdparty.org.json.JSONTokener;
import java.io.BufferedReader;
import java.io.InputStreamReader;
import java.nio.charset.StandardCharsets;public class StartRequestHandler extends CustomJavaAction<java.lang.Boolean>
{
    @java.lang.Override
    public java.lang.Boolean executeAction() throws Exception
    {
        // BEGIN USER CODE
        com.mendix.core.Core.addRequestHandler(”basic/”, new MyCustomHandler());
        com.mendix.core.Core.addRequestHandler(”json/”, new JsonHandler());
        return true;
        // END USER CODE
    }    // BEGIN EXTRA CODE
    public class MyCustomHandler extends com.mendix.externalinterface.connector.RequestHandler {
        @Override
        protected void processRequest(com.mendix.m2ee.api.IMxRuntimeRequest request,
                                      com.mendix.m2ee.api.IMxRuntimeResponse response,
                                      String path) throws Exception {
            String name = request.getParameter(”name”);
            response.setContentType(”text/plain”);
            response.setStatus(200);
            response.getWriter().write(”Hello, “ + (name != null ? name : “Guest”) + “!”);
        }
    }    public class JsonHandler extends com.mendix.externalinterface.connector.RequestHandler {
        @Override
        protected void processRequest(com.mendix.m2ee.api.IMxRuntimeRequest request,
                                      com.mendix.m2ee.api.IMxRuntimeResponse response,
                                      String path) throws Exception {
            JSONObject inputJson;

            // Read JSON from request body
            try (BufferedReader reader = new BufferedReader(
                    new InputStreamReader(request.getInputStream(), StandardCharsets.UTF_8))) {
                inputJson = new JSONObject(new JSONTokener(reader));
            }

            // Process and respond
            String name = inputJson.optString(”name”, “Guest”);
            JSONObject output = new JSONObject().put(”message”, “Hello “ + name);

            response.setContentType(”application/json”);
            response.getWriter().write(output.toString());
        }
    }
    // END EXTRA CODE
}
Test the JSON Handler
Restart your server and test the JSON endpoint:
curl -H “Content-Type: application/json” -X POST http://localhost:8080/json/ --data ‘{”name”:”john”}’
# Returns: {”message”:”Hello john”}
Key Concepts
The key concepts are as follows:
Request Handler Registration: Handlers are registered using Core.addRequestHandler(path, handler) during app startup. The path acts as the URL prefix for your custom endpoint.
Request Processing: We override processRequest() to handle incoming requests. In this method you will have access to:
Request parameters and headers
Request body (as stream or parsed data)
HTTP method (GET, POST, etc.)
Path information
Response Control: You can set content type, status codes, and write response data directly to the output writer.
JSON Processing: Mendix includes org.json library for JSON parsing. You do not need to download this library and add it to the ./userlibdirectory. Use JSONTokener with a BufferedReader to handle input streams properly.
Best Practices
Error Handling: Wrap request processing in try-catch blocks and return appropriate HTTP status codes
Authentication: Though not illustrated here, it is advisable to implement custom auth logic in your handler if needed
Logging: Use
Core.getLogger()to log request detailsPerformance: Keep handlers lightweight
Security: Validate all inputs and sanitize data before processing


Comments
Post a Comment