Integrating Mendix with MCP: A Practical Guide

Introduction
The Model Context Protocol (MCP) is revolutionizing how AI assistants interact with external systems and data sources. In this guide, we’ll walk through integrating Mendix — a leading low-code application platform — with MCP, enabling Claude and other AI assistants to directly interact with your Mendix applications. The original article may be found here.
What is Mendix?
Mendix is a low-code application development platform that allows developers to build enterprise applications quickly with visual models and minimal hand-coding. It’s widely used for creating business applications, workflows, and data-driven solutions.
What is MCP?
The Model Context Protocol (MCP) is an open protocol that standardizes how AI assistants connect to external data sources and tools. It allows AI models like Claude to interact with various systems through a unified interface, extending their capabilities beyond their training data.
Why Integrate Mendix with MCP?
Integrating Mendix with MCP unlocks powerful possibilities:
Allow AI assistants to query and interact with your Mendix applications
Enable natural language interactions with your business data
Create intelligent workflows that combine AI reasoning with your existing business logic
Build agentic applications that can leverage both AI and your custom Mendix services
Prerequisites
Before you begin, make sure you have:
A Mendix development environment set up
Basic knowledge of Mendix microflows and domain models
Claude Desktop app installed (or another MCP-compatible client)
Node.js and npm installed on your system
Access to the Mendix Marketplace
Integration Architecture
The integration works through a Server-Sent Events (SSE) endpoint that Mendix exposes. The MCP client (like Claude Desktop) connects to this endpoint using the mcp-remote package, which bridges the HTTP/SSE transport to the MCP protocol. Your Mendix application then handles incoming MCP requests through custom microflows.
Step-by-Step Integration
Step 1: Set Up Your Mendix Project
Start by creating a new Mendix project or opening an existing one. This will serve as the foundation for your MCP integration.
Step 2: Install the MCPServer Module
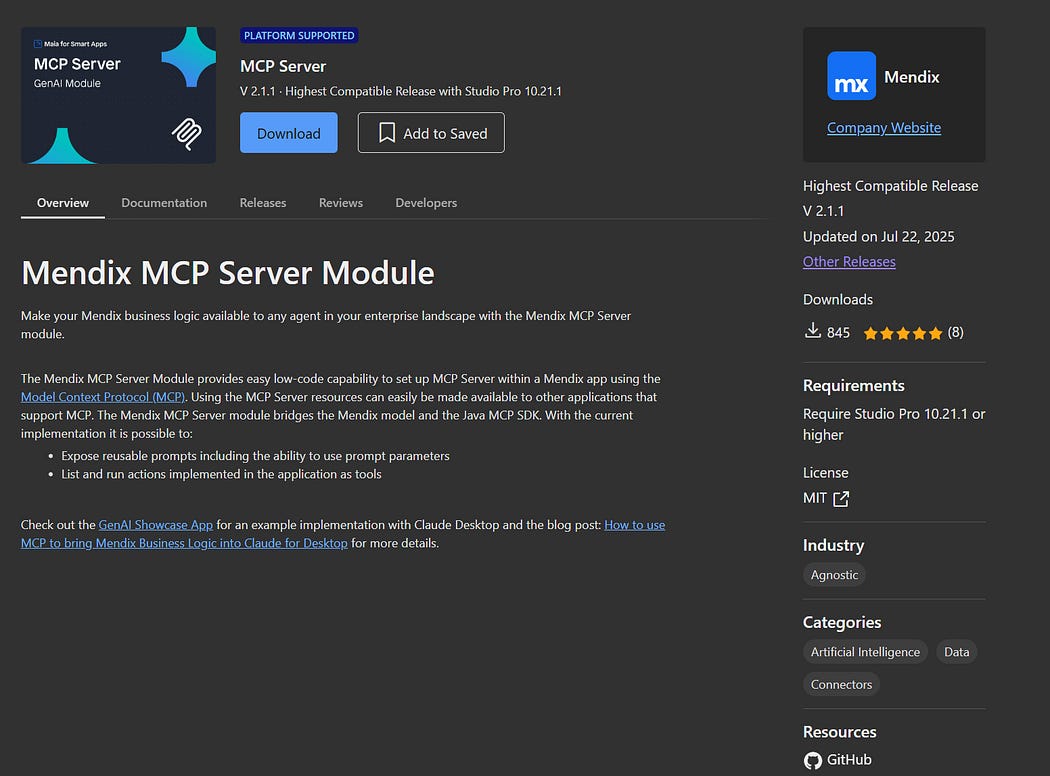
MCPServer Marketplace Module
Download and install the MCPServer module from the Mendix Marketplace. This module provides the core functionality needed to expose MCP endpoints from your Mendix application.
Step 3: Create the MCP Module Structure
Create a new module in your Mendix project called MCP
Inside the MCP module, create a module user role (e.g.,
MCPUser)Create an application-level user role called MCPUser
Assign the app user role to the module user role to establish the security connection
Step 4: Configure User Authentication
Create a microflow called MCP.IVK_Authenticate:
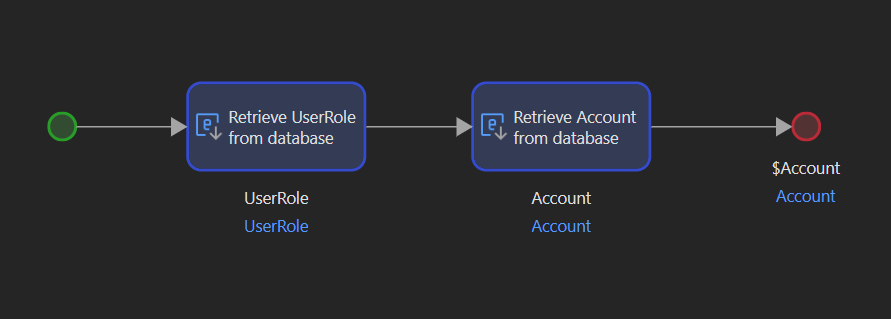
This microflow handles authentication for incoming MCP requests.
Retrieve the user role named
MCPUserReturn the first user associated with that role
Step 5: Initialize the MCP Server
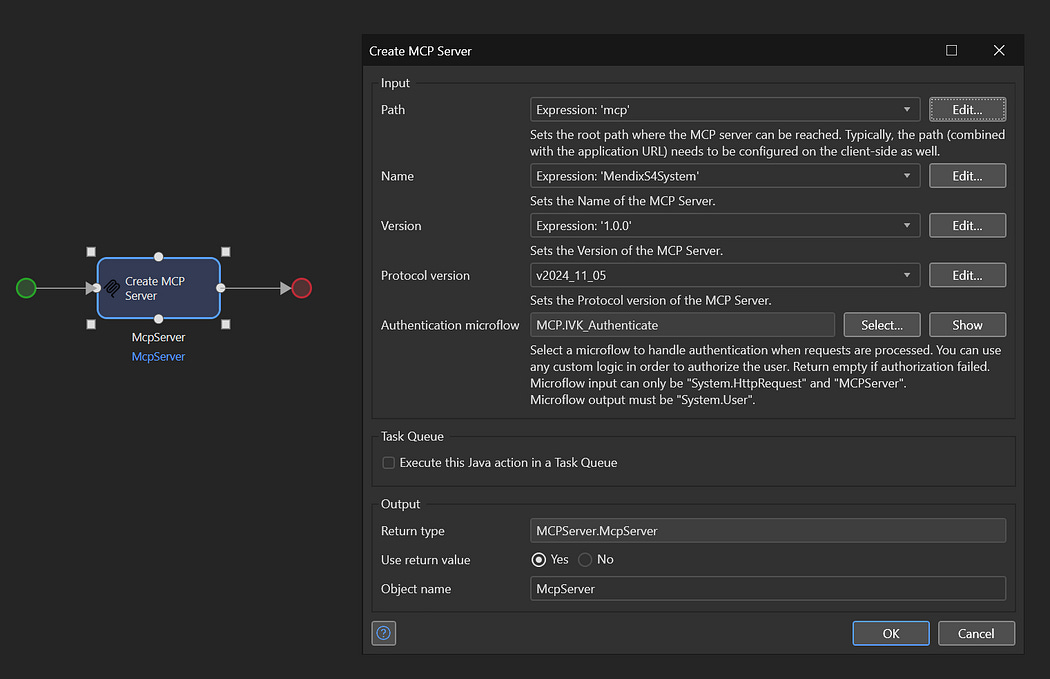
Create an After Startup microflow ASU_MCP that will initialize your MCP server when the application starts:
Call the Create MCP Server action from the MCPServer module
Store the returned MCPServer object in a variable (e.g.,
$McpServer)
Starting the MCP Server
Step 6: Verify Server Startup
After starting your Mendix application, check the console logs. You should see an Info log from the “Connector” log node stating:
Added request handler ‘mcp/’ with class ‘mcpserver.impl.McpServerRequestHandler’This confirms the MCP endpoint is active.
Step 7: Test the SSE Endpoint
Test that the MCP SSE endpoint is accessible by navigating to:
http://localhost:8080/mcp/sseThis should deliver the following response:
MCP sse response
If you need to debug authentication, add a breakpoint in the IVK_Authenticate microflow.
If all worked up to this point we can move on with setting up an MCP tool.
Step 8: Add Your First MCP Tool
First we need to create a Microflow for the tool. Create MCP.DS_Time taking no arguments that returns the current time:
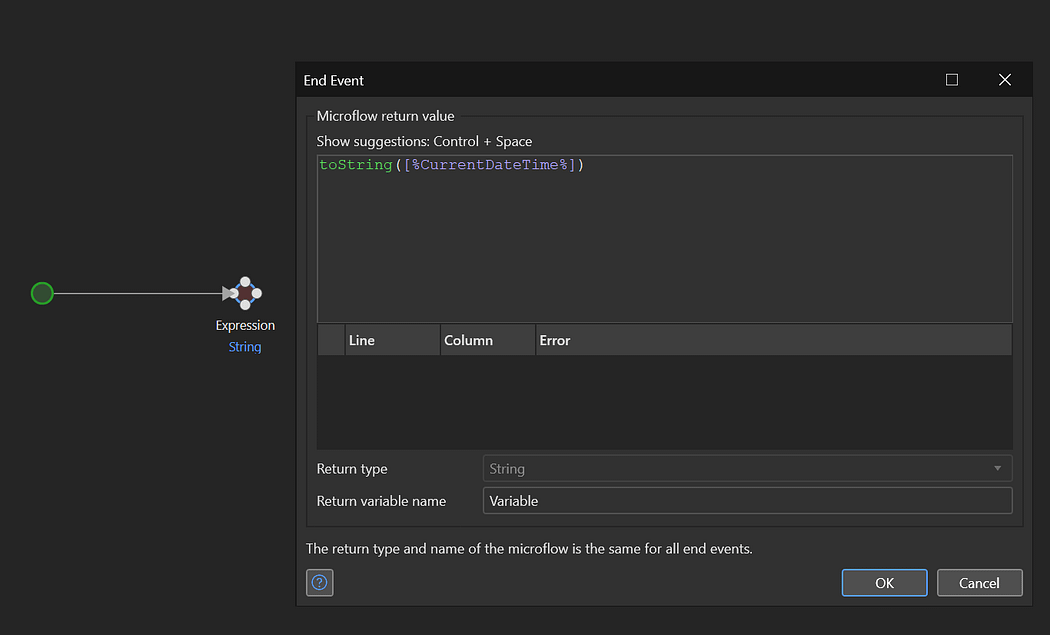
Simple flow returning current time
Next, add a simple tool that requires no arguments. Add the “Add Tool” action in your MCP.ASU_MCP microflow
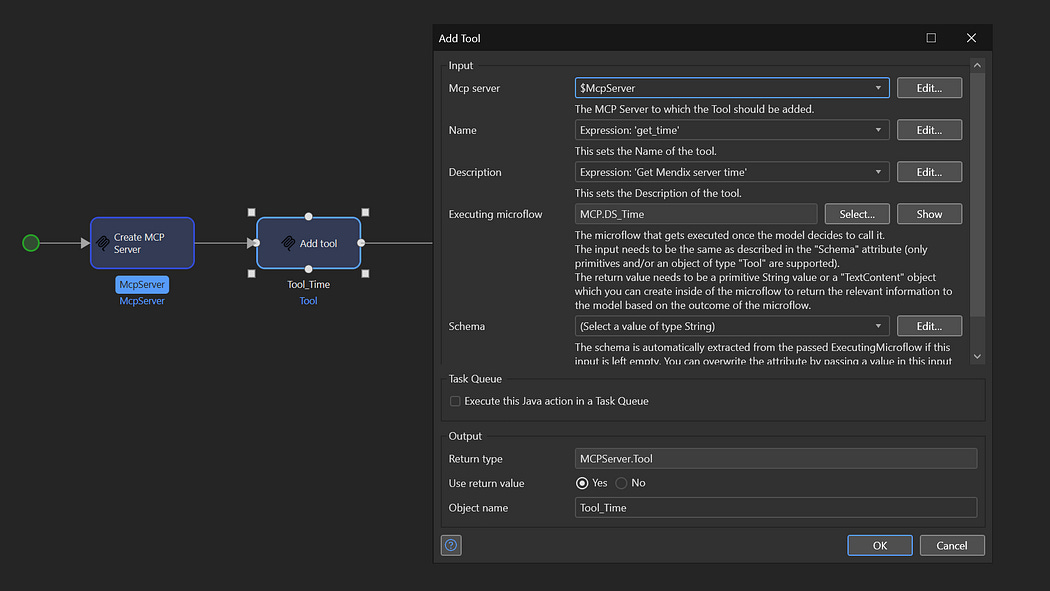
Registering the first tool
Use the following values:
Name: ‘get_time’
Description: ‘Get Mendix server time’
Schema: Leave empty (no arguments needed)
Executing microflow: Create
MCP.DS_Timethat retrieves and returns the server timeMCP Server:
$McpServer
Step 9: Enable Detailed Logging
Set the MCPServer log node to Trace level in your Mendix console to see detailed MCP communication logs. This is useful to check the incoming MCP requests which will follow in the next steps.
Step 10: Configure Claude Desktop
Locate your Claude Desktop configuration file and update it with the following MCP server configuration:
{
  “globalShortcut”: “”,
  “mcpServers”: {
    “mendis_mcp”: {
      “command”: “npx”,
      “args”: [
        “mcp-remote”,
        “http://localhost:8080/mcp/sse”,
        “--allow-http”
      ]
    }
  },
  “preferences”: {
    “legacyQuickEntryEnabled”: false,
    “menuBarEnabled”: false
  }
}
To ensure the the changes are applied, shut down Claude Desktop completely (on Windows: taskkill /f /im claude.exe).
Step 11: Test the Connection
Restart Claude Desktop
Monitor your Mendix console logs — you should see connection activity from the MCP client
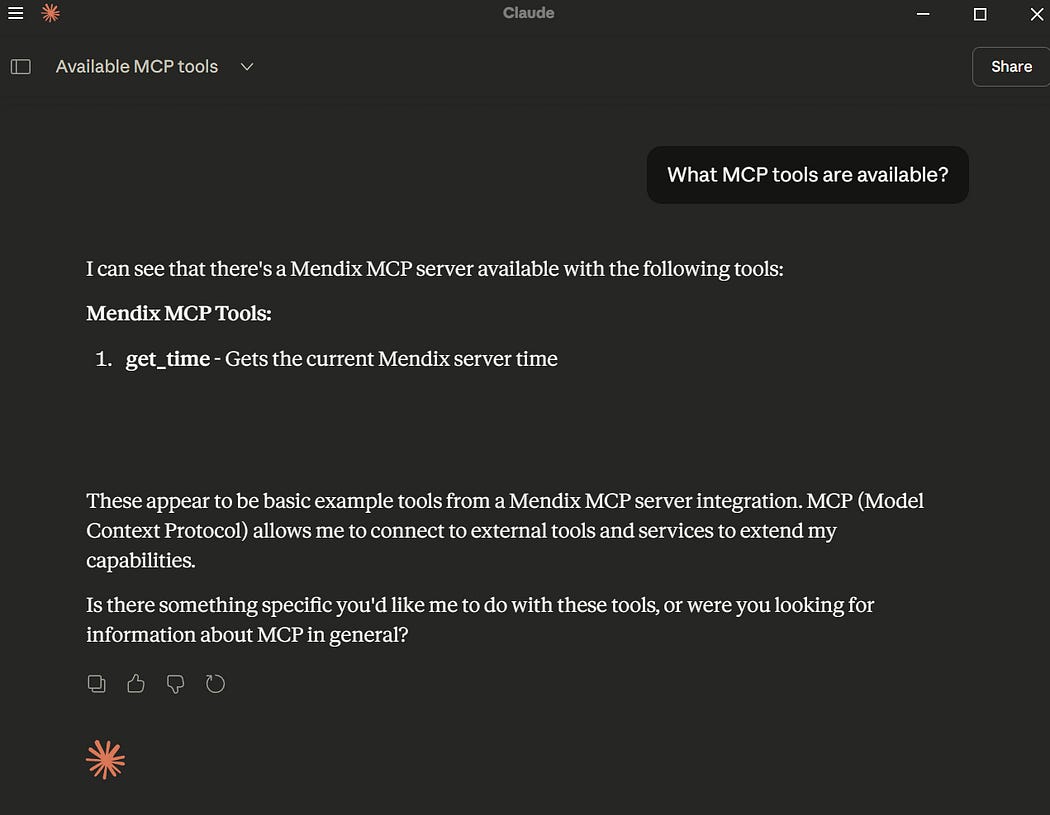
In Claude, ask: “What MCP tools are available?”
Claude should list your
get_timetool
Ask Claude: “Use the Mendix MCP tool to print out the server time”
Claude should successfully call your Mendix microflow and return the result
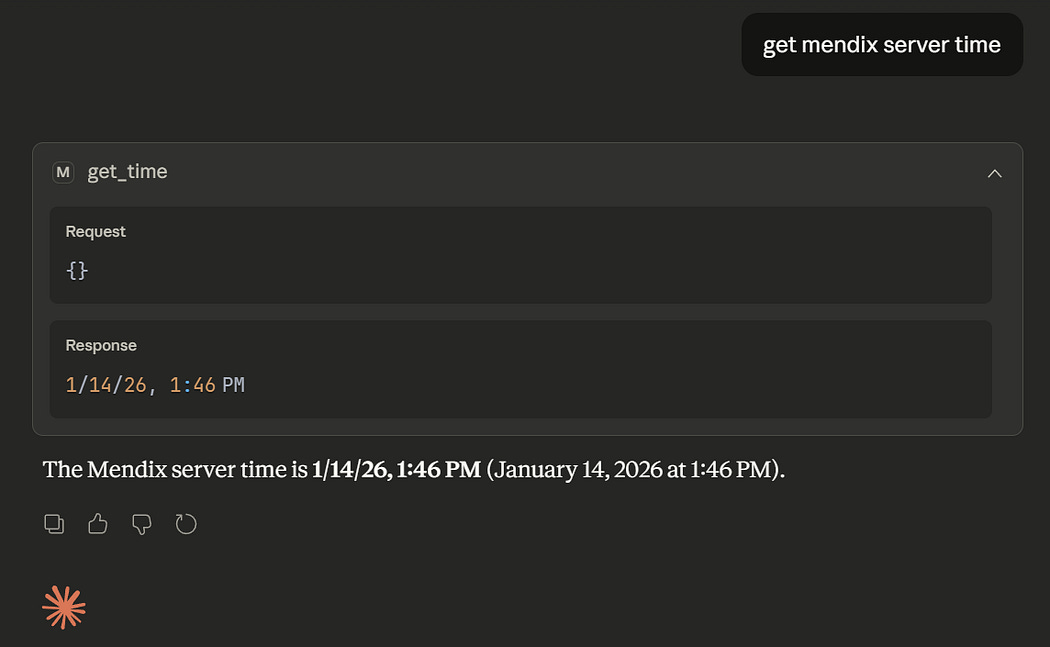
You can also add a breakpoint in MCP.DS_Time to verify that the flow is actually executed
Step 12: Add a Tool with Arguments
Now let’s create a more complex tool that accepts parameters. This example adds two numbers:
Create a new microflow
S4MCP.IVK_GetSumwith two input parameters:a(Decimal) andb(Decimal)In your MCP.ASU_MCP microflow, add another “Add Tool” action with the following configuration:
Name: ‘get_sum’
Description: ‘Get result for adding two numbers’
Schema: Define a JSON schema specifying the two number parameters:
{
  “type”: “object”,
  “properties”: {
    “a”: {
      “type”: “number”,
      “description”: “First number”
    },
    “b”: {
      “type”: “number”,
      “description”: “Second number”
    }
  },
  “required”: [”a”, “b”]
}
Executing microflow:
MCP.IVK_GetSumMCP Server:
$McpServer
The microflow should look something like this:

Simple tool flow taking two arguments
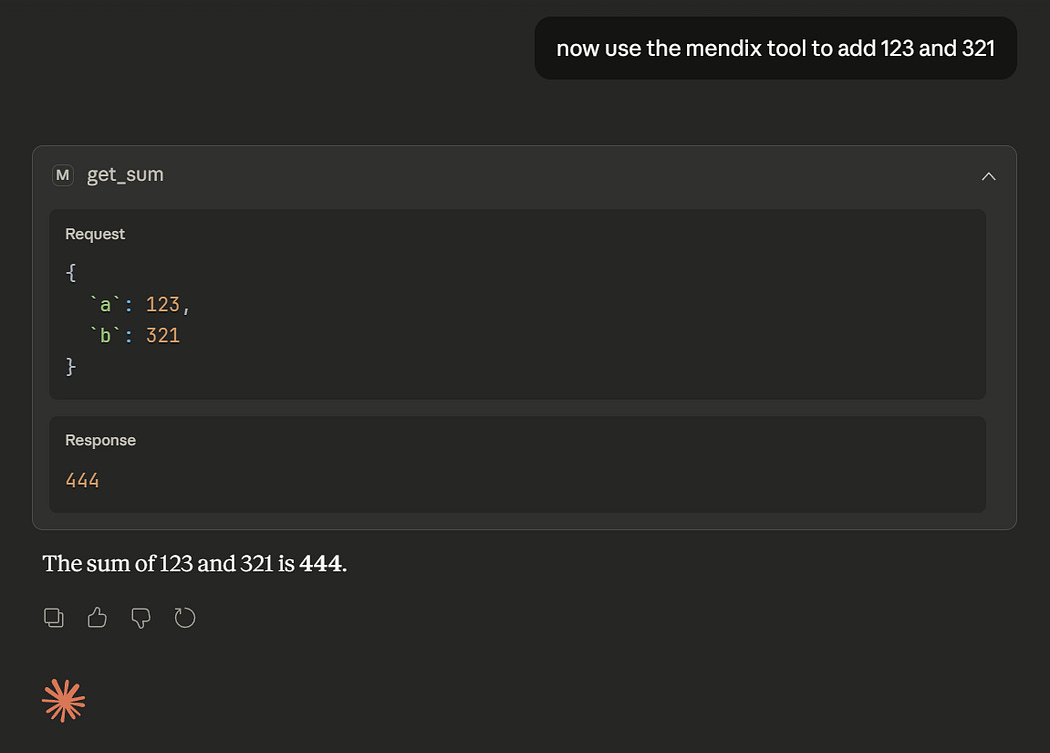
Note that a MCPServer.TextContent MCPServer.TextConentobject is being returned, with the Contentfield set to the sum. Now you can test this by:
Restart your Mendix application
In Claude, ask it to add two numbers using your tool
Common Issues
Claude Desktop Not Connecting
Solution: Ensure your Mendix app is running and the SSE endpoint is accessible. Check that the mcp-remote package can reach your localhost. At times Claude may loose the connection to the server. In that case, shut down and restart Claude completely
New Tools Not Appearing in Claude
Solution: Ensure you’re adding tools to the MCP server before calling the start server action. Restart both Mendix and Claude Desktop after making changes.


Comments
Post a Comment