Integrating Supabase with Mendix

Overview
This guide demonstrates how to integrate Supabase’s REST API with Mendix.
Original article available here.
Setting Up Supabase
Set up a Supabase account by visiting
https://supabase.com
. Once logged in create a new project and get your API credentials by navigating to Project Settings → API
You need the following values:
Project URL:
https://your-project-id.supabase.co
anon public key: Used for client-side requests
service_role secret key: For administrative operations
Also, navigate to Account → Access Tokens and generate a new Personal Access Token.
Supabase REST API
You can create tables via the dashboard or using the REST Management API. For doing this via REST, you need the Project ID and the Personal Access Token you generated.
#!/bin/bash
source ./.env
curl -X POST “https://api.supabase.com/v1/projects/$PROJECT_ID/database/query” \
  -H “Authorization: Bearer $SUPABASE_ACCESS_TOKEN” \
  -H “Content-Type: application/json” \
  -d ‘{
    “query”: “CREATE TABLE IF NOT EXISTS users (
      id BIGSERIAL PRIMARY KEY,
      name TEXT NOT NULL,
      email TEXT UNIQUE NOT NULL,
      created_at TIMESTAMPTZ DEFAULT NOW()
    );”
  }’
After the table has been created you can insert some data using the following:
#!/bin/bash
curl -X POST “https://$PROJECT_ID.supabase.co/rest/v1/users” \
  -H “apikey: $API_KEY” \
  -H “Authorization: Bearer $SERVICE_ROLE_KEY” \
  -H “Content-Type: application/json” \
  -H “Prefer: return=representation” \
  -d ‘{”name”: “John Doe”, “email”: “john@example.com”}’
Multiple rows can be inserted as follows:
#!/bin/bash
curl -X POST “https://$PROJECT_ID.supabase.co/rest/v1/users” \
  -H “apikey: $API_KEY” \
  -H “Authorization: Bearer $SERVICE_ROLE_KEY” \
  -H “Content-Type: application/json” \
  -H “Prefer: return=representation” \
  -d ‘[
    {”name”: “John Doe”, “email”: “john@example.com”},
    {”name”: “Jane Smith”, “email”: “jane@example.com”}
  ]’
All rows can be selected as follows:
#!/bin/bash
curl “https://$PROJECT_ID.supabase.co/rest/v1/users” \
  -H “apikey: $API_KEY” \
  -H “Authorization: Bearer $SERVICE_ROLE_KEY”
Filters can be applied to selections as follows:
#!/bin/bash
curl “https://$PROJECT_ID.supabase.co/rest/v1/users?age=gt.25” \
  -H “apikey: $API_KEY” \
  -H “Authorization: Bearer $SERVICE_ROLE_KEY”
Specific columns can be selected as follows:
#!/bin/bash
curl “https://$PROJECT_ID.supabase.co/rest/v1/users?select=name,email” \
  -H “apikey: $API_KEY” \
  -H “Authorization: Bearer $SERVICE_ROLE_KEY”
Rows can be updated as follows:
#!/bin/bash
curl -X PATCH “https://$PROJECT_ID.supabase.co/rest/v1/users?id=eq.1” \
  -H “apikey: $API_KEY” \
  -H “Authorization: Bearer $SERVICE_ROLE_KEY” \
  -H “Content-Type: application/json” \
  -H “Prefer: return=representation” \
  -d ‘{”name”: “John Wayne”}
Rows can be deleted as follows:
#!/bin/bash
curl -X DELETE “https://$PROJECT_ID.supabase.co/rest/v1/users?id=eq.1” \
  -H “apikey: $API_KEY” \
  -H “Authorization: Bearer $SERVICE_ROLE_KEY”
Configuring Mendix
Begin by setting up a Supabase Config entity:

Configuration Entity
Also, create a page to edit the configuration.
Next, let’s create an interface for running queries. Start by creating a JSON structure for the query request:
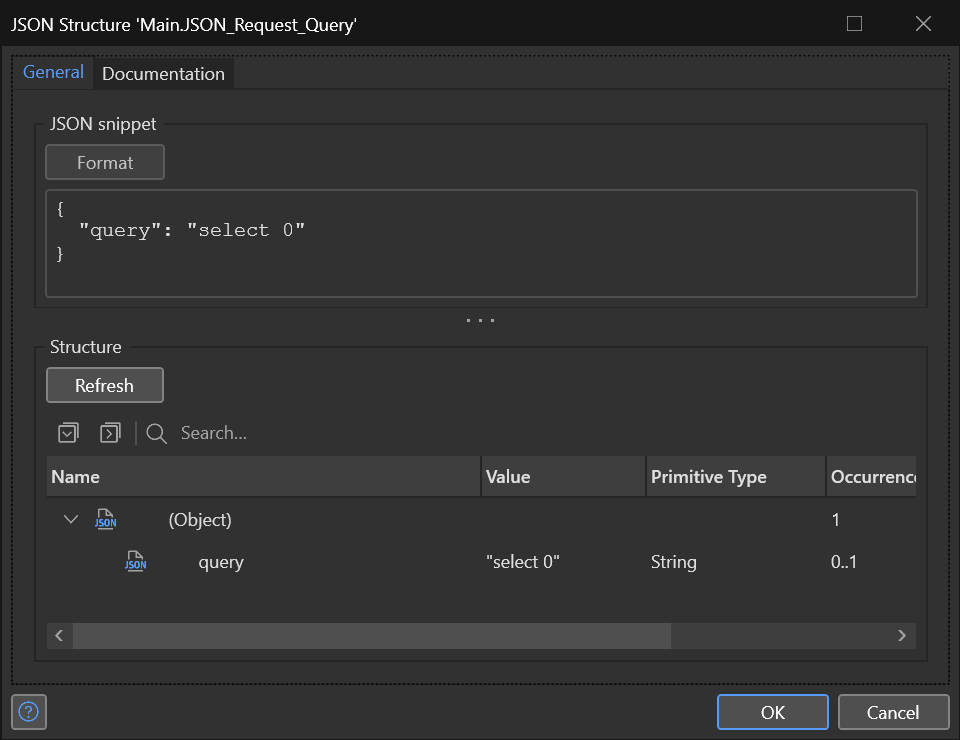
Query JSON Structure
Next, use the JSON structure to set up an Export Mapping and use the automapping mapping facilities to create a Query entity:
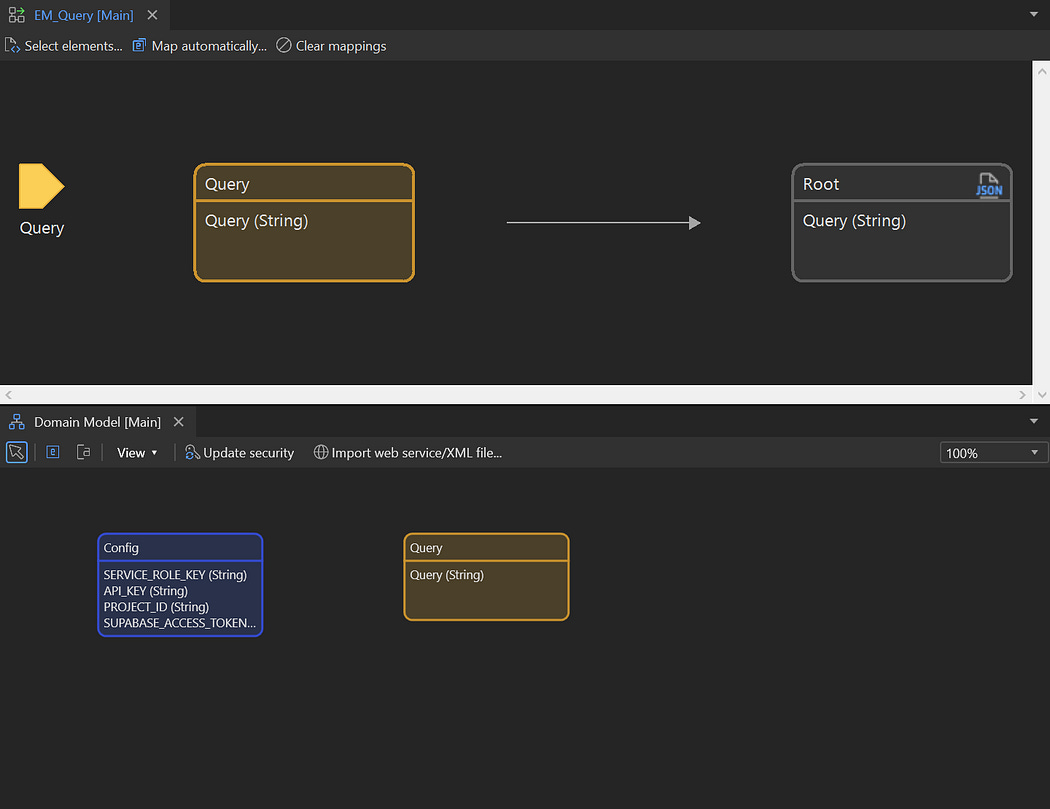
Export Mapping and Query Entity
After this is done, set up a Query editing page:
Query Editing Page
Replace the default Save button with a new Microflow IVK_Query:
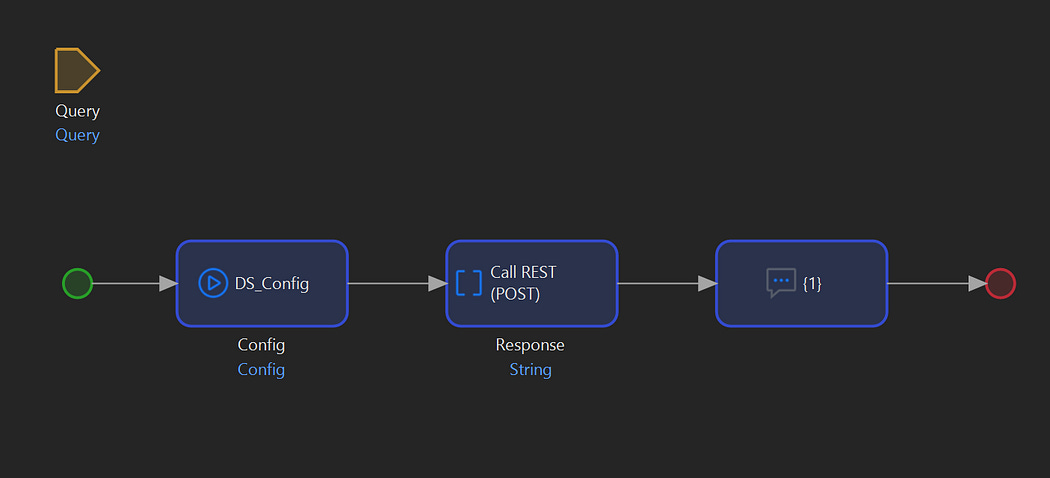
IVK_Query
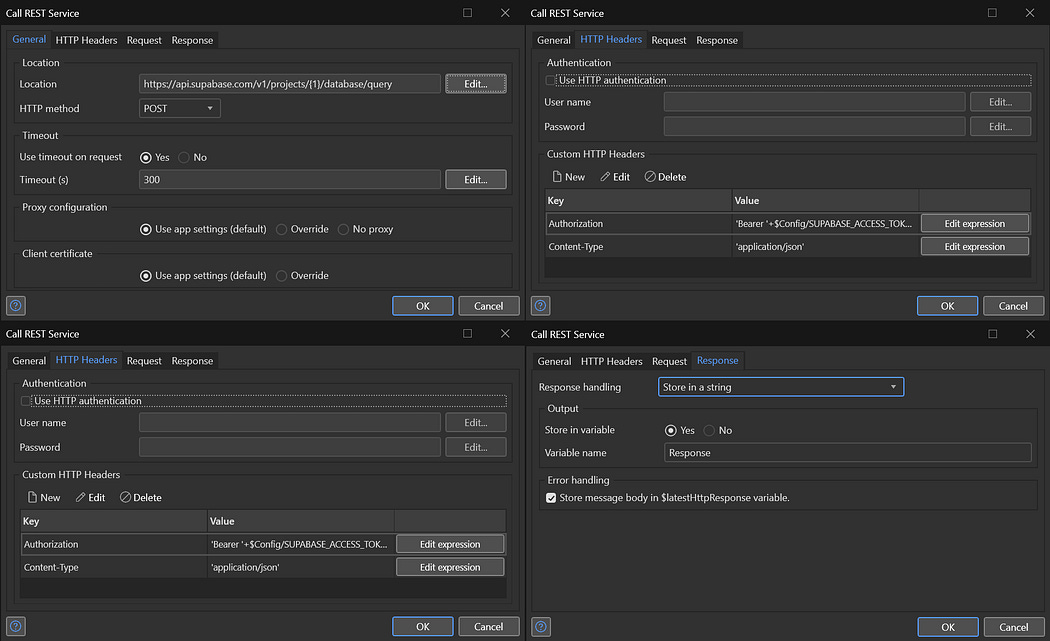
Use the following configuration for the REST call:
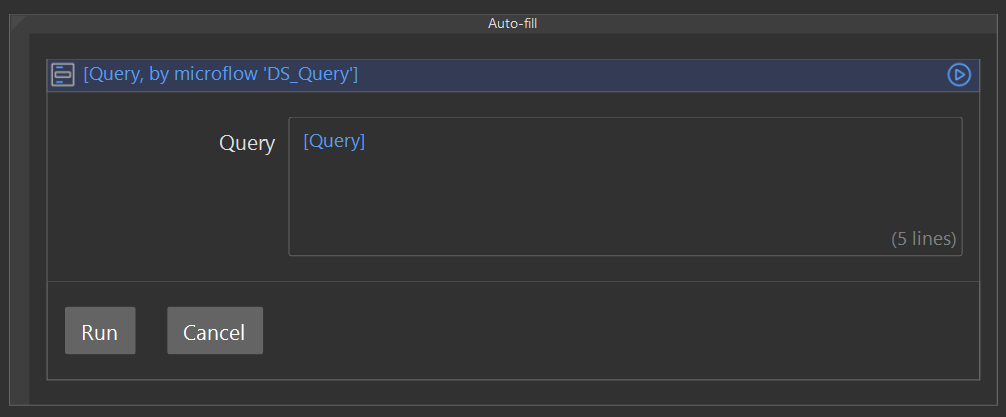
Now you can run any query you want:
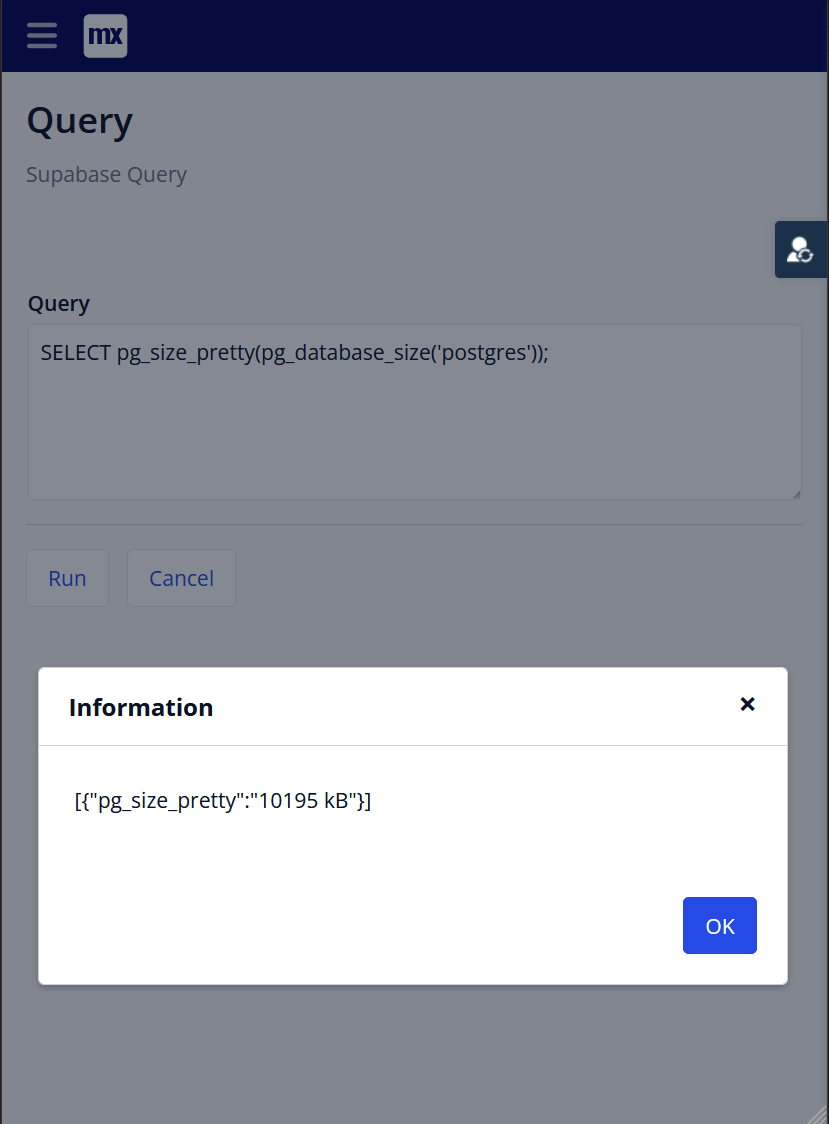
Checking the Database Size
For our previously created User Supabase table, we can create JSON structures for the requests and responses:
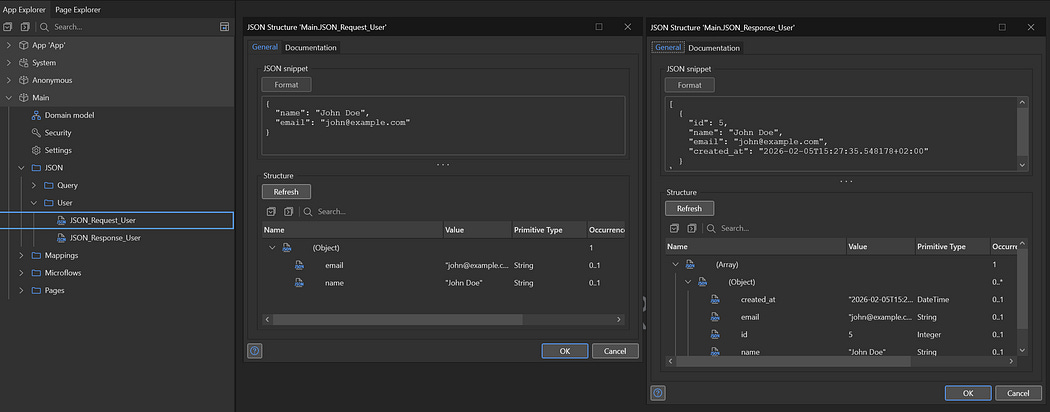
User Request and Response JSON Structures
After that, for these JSON structures you can create Import and Export mappings and create the Domain as follows:

Supabase User Domain
With this in place, the following set of Microflows can be created:
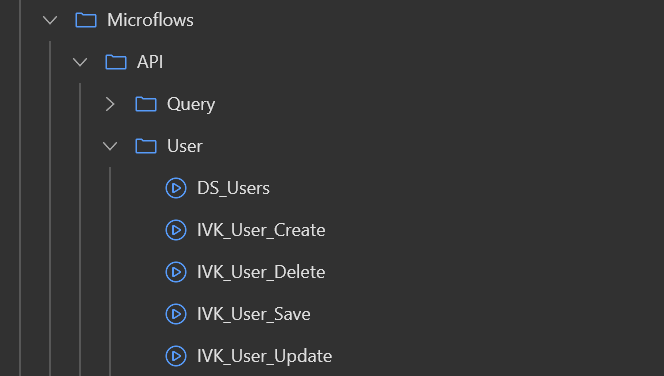
User Microflows
Implementing these Microflows are trivial, for example DS_Users:
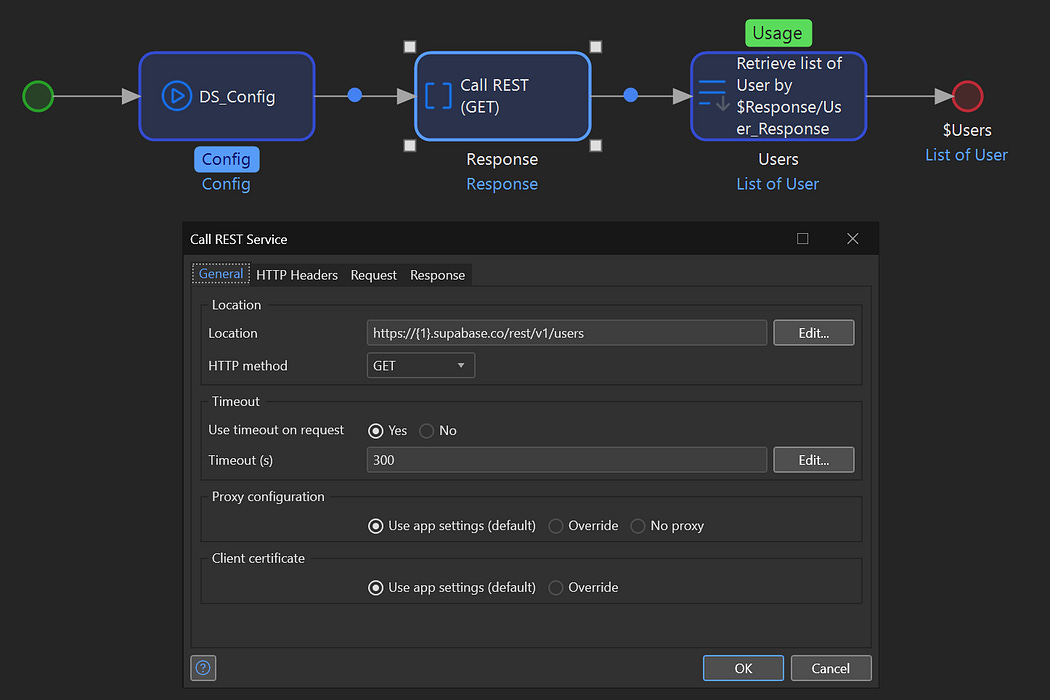
Users Data Source
Next, an overview and edit page can be created for the User entity:

User Overview and Edit Pages
For the Save button, choosing between calling IVK_User_Update and IVK_User_Create is accomplished by checking if Created_at is empty.
With all this in place you should have a functional overview page for the Users table from Supabase.
Resources
Supabase Documentation: https://supabase.com/docs
Supabase REST API Reference: https://supabase.com/docs/guides/api
Mendix REST Services: https://docs.mendix.com/refguide/consumed-rest-services/


Comments
Post a Comment