Using Emscripten to Run C Code in Mendix

Introduction
In this post we will look at how to compile C code to WebAssembly and integrate it into Mendix.
Original article available here.
Prerequisites
Emscripten is the compiler toolchain that converts C/C++ to WebAssembly. You can install it as follows:
git clone https://github.com/emscripten-core/emsdk.git
cd emsdk
./emsdk install latest
./emsdk activate latest
source ./emsdk_env.sh
You can add source ~/emsdk/emsdk_env.sh to your ~/.bashrc so it’s always available.
C Code
Create a file called simple-calculator.c:
#include <stdio.h>
#include <string.h>
#include <emscripten/emscripten.h>
EMSCRIPTEN_KEEPALIVE
int add(int a, int b) {
    return a + b;
}
EMSCRIPTEN_KEEPALIVE
int sub(int a, int b) {
    return a - b;
}
EMSCRIPTEN_KEEPALIVE
int mul(int a, int b) {
    return a * b;
}
EMSCRIPTEN_KEEPALIVE
double div_safe(double a, double b) {
    if (b == 0) return 0;
    return a / b;
}
EMSCRIPTEN_KEEPALIVE
char* concat(const char* str1, const char* str2) {
    size_t len1 = strlen(str1);
    size_t len2 = strlen(str2);
    char* result = (char*)malloc(len1 + len2 + 1);

    if (result) {
        strcpy(result, str1);
        strcat(result, str2);
    }

    return result;
}
int main() {
    printf(”Calculator module loaded\n”);
    return 0;
}
In the above, EMSCRIPTEN_KEEPALIVE ensures functions aren’t optimized away.
To compile this, you can run the following:
emcc simple-calculator.c \
    -o simple-calculator.js \
    -s EXPORTED_FUNCTIONS=’[”_add”,”_sub”,”_mul”,”_div_safe”,”_concat”,”_malloc”,”_free”]’ \
    -s EXPORTED_RUNTIME_METHODS=’[”ccall”,”cwrap”,”UTF8ToString”,”stringToNewUTF8”]’ \
    -s MODULARIZE=1 \
    -s EXPORT_NAME=’SimpleCalculator’ \
    -s ENVIRONMENT=’web’ \
    -s ALLOW_MEMORY_GROWTH=1 \
    -s SINGLE_FILE=1 \
    -O3
The -s SINGLE_FILE=1 flag embeds the WASM in a single JavaScript file, which makes it easier to use in Mendix.
API Wrapper
Next, create a wrapper calculator-wrapper.js:
import SimpleCalculator from ‘./simple-calculator.js’;

let moduleInstance = null;
let initPromise = null;

async function initialize() {
    if (moduleInstance) {
        return moduleInstance;
    }

    if (initPromise) {
        return initPromise;
    }

    initPromise = SimpleCalculator()
        .then(module => {
            moduleInstance = module;
            console.log(’Calculator module initialized Ô£ô’);
            return moduleInstance;
        })
        .catch(error => {
            console.error(’Failed to initialize calculator:’, error);
            initPromise = null;
            throw error;
        });

    return initPromise;
}

export async function add(a, b) {
    const module = await initialize();
    return module._add(a, b);
}

export async function sub(a, b) {
    const module = await initialize();
    return module._sub(a, b);
}

export async function mul(a, b) {
    const module = await initialize();
    return module._mul(a, b);
}

export async function div(a, b) {
    const module = await initialize();
    return module._div_safe(a, b);
}

export async function concat(str1, str2) {
    const module = await initialize();
    return module.ccall(
        ‘concat’,
        ‘string’,
        [’string’, ‘string’],
        [str1, str2]
    );
}

export async function getCalculator() {
    return await initialize();
}

export function resetCalculator() {
    moduleInstance = null;
    initPromise = null;
}
This wrapper will be imported into a Mendix JavaScript Action and will initialize the library, hide the underscore prefixes (_add → add), and provide a simple API.
In a new Mendix project, copy simple-calculator.js and calculator-wrapper to javascriptsource/myfirstmodule/actions.
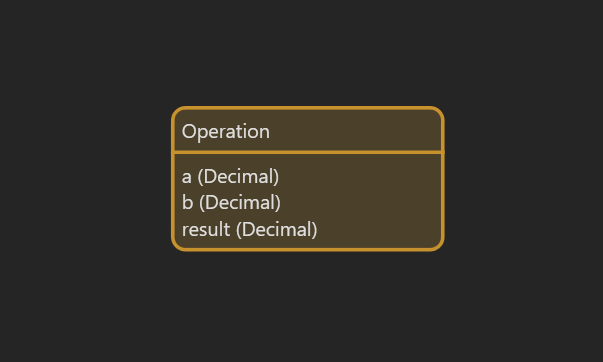
In StudioPro, create an entity for testing the API:
Next, create a JavaScript action for the add function:
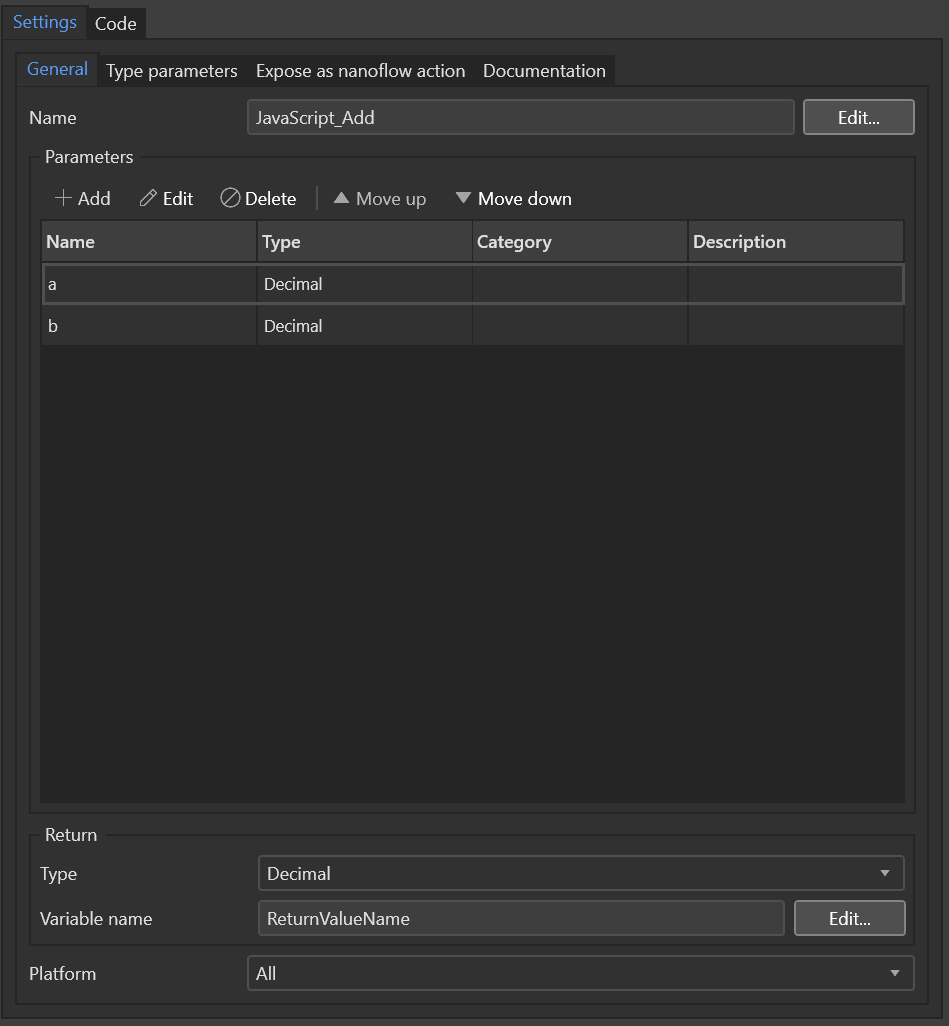
Add JavaScript Action Configuration
Use the following for action code:
import “mx-global”;
import { Big } from “big.js”;
import { add } from “./calculator-wrapper.js”;

export async function JavaScript_Add(a, b) {
 // BEGIN USER CODE
 try{
  let result=add(a.toNumber(),b.toNumber());
  return(Promise.resolve(result));
 }catch(e){
  return(Promise.reject(e.toString()));
 }
 // END USER CODE
}
In a similar fashion, implement the JavaScript Actions for the other operations.
Next, create a Nanoflow for the add operation:
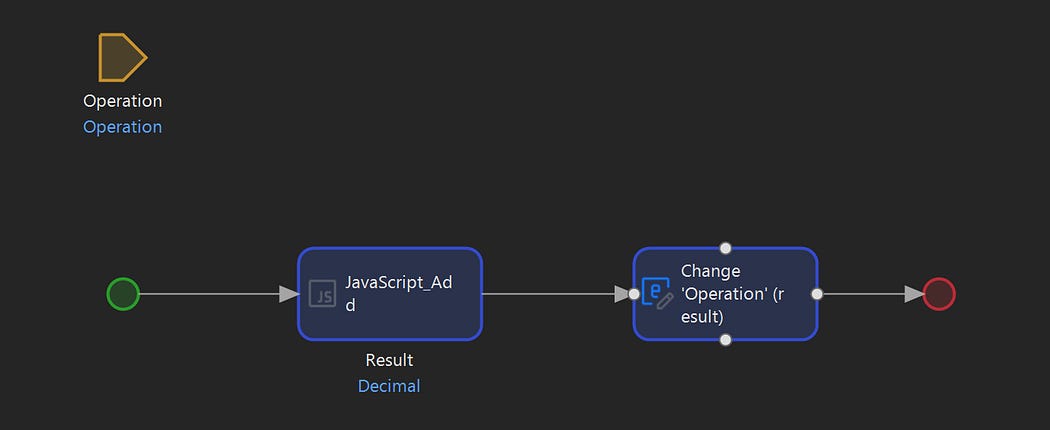
Add Nanoflow
Similarly, create Nanoflows for the other operations.
Finally, create a test page:
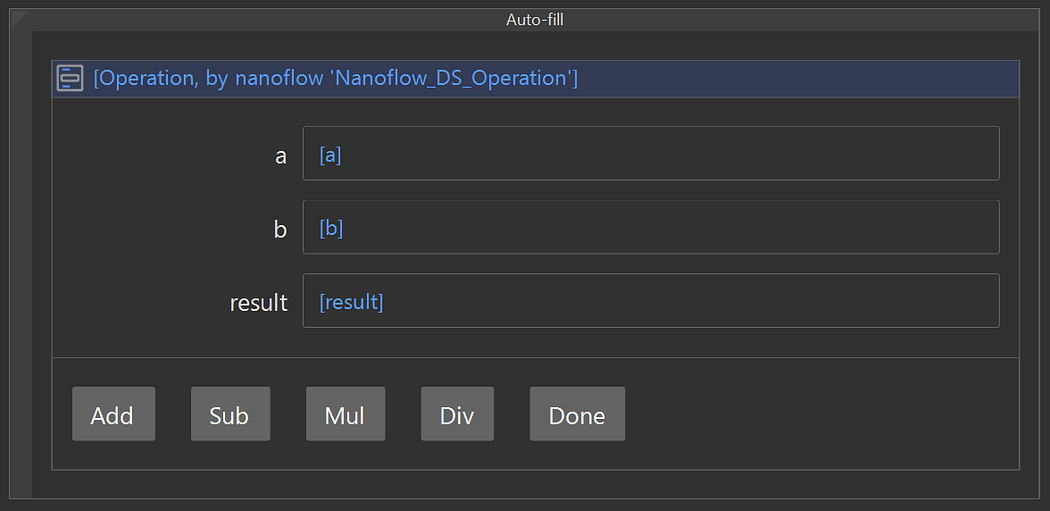
Test Page
Running the project, you should now be able to call the C functions by clicking the buttons.


Comments
Post a Comment